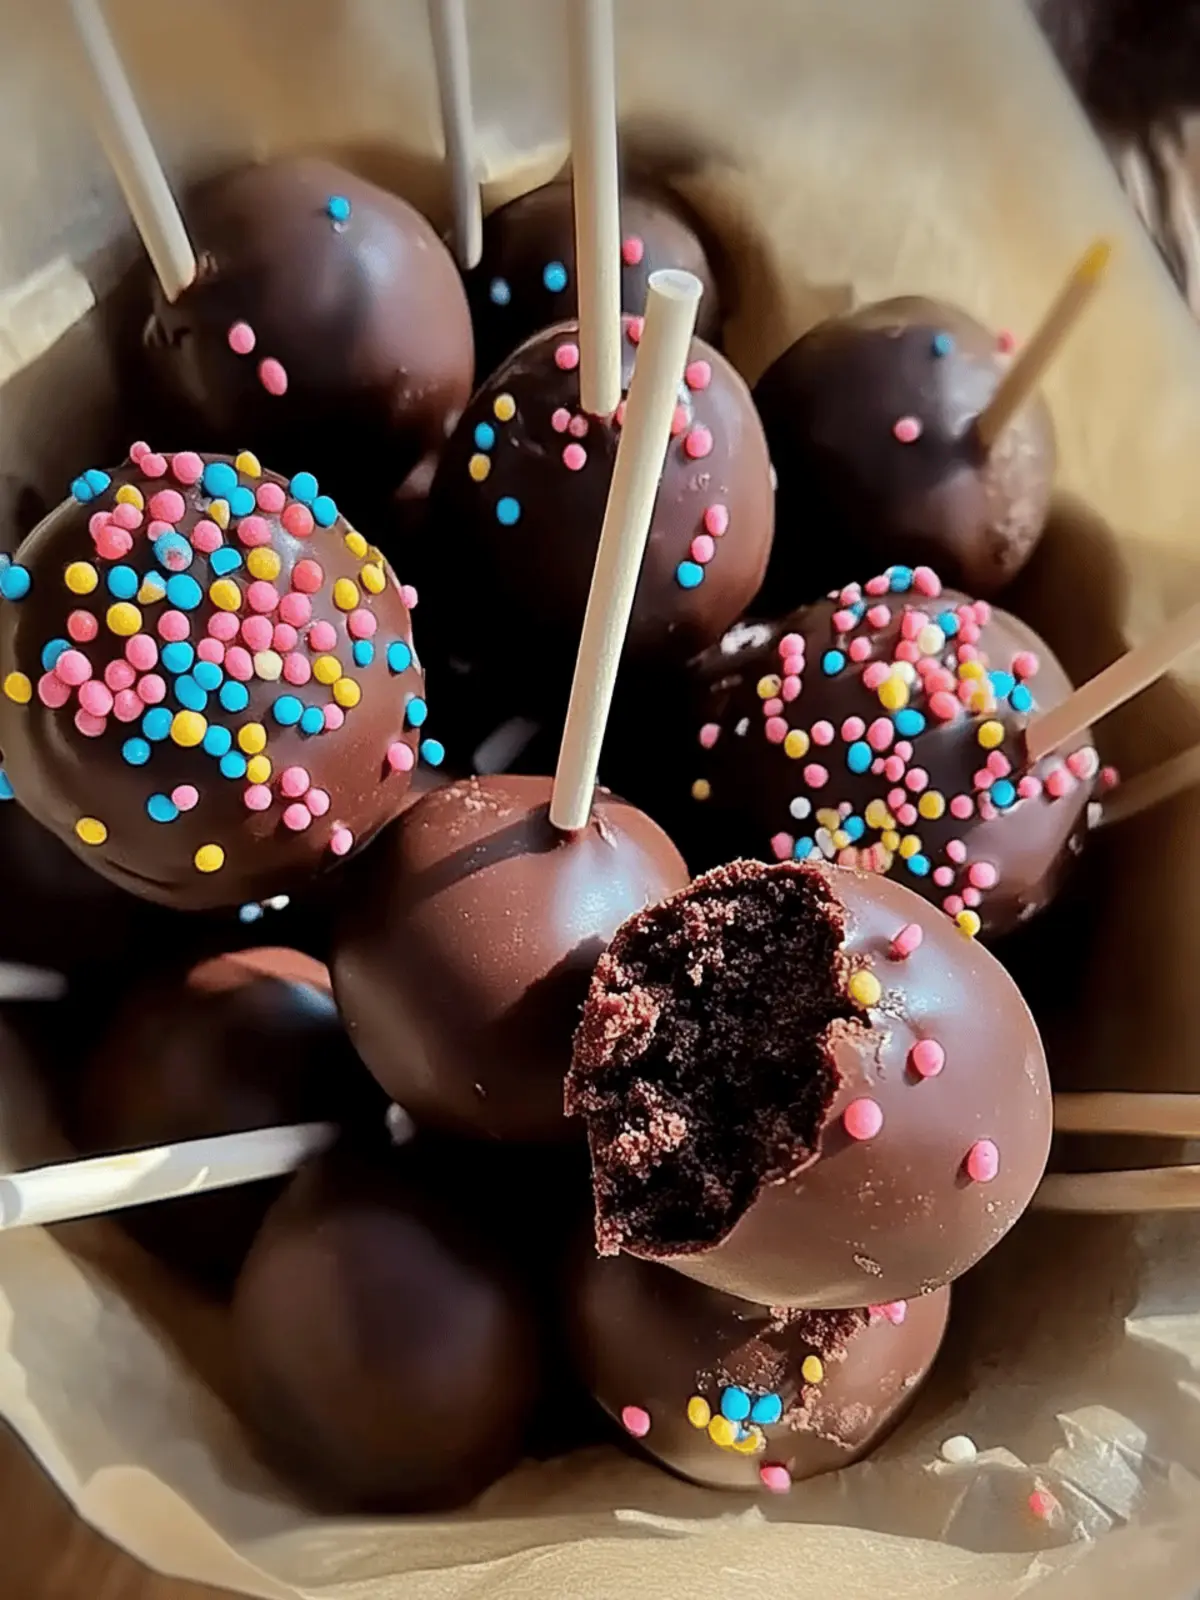
There’s something undeniably enticing about the sight of cake pops elegantly lined up on a platter, their glossy chocolate coating catching the light. I first discovered this charming treat at a friend’s birthday party, and it was love at first bite. These little morsels are not just adorable; they pack an explosion of flavor in every mouthful!
Perfectly customizable, chocolate cake pops allow you to unleash your creativity by experimenting with different cake flavors, coatings, and toppings, making them suitable for any occasion—from festive celebrations to cozy afternoon treats. And let’s be honest: who doesn’t enjoy a good dessert that looks as fun as it tastes?
Join me on this sweet adventure as we whip up these decadent chocolate cake pops, combining simple ingredients and straightforward methods to create a delightful dessert that’s sure to amaze your family and friends. Whether you’re a seasoned chef or a kitchen newbie, these cake pops will elevate your dessert game and bring smiles all around!
Why You’ll Love Chocolate Cake Pops
Irresistible Appeal: These chocolate cake pops are not only visually stunning but also incredibly tasty—they’ll steal the show at any gathering!
Easy to Customize: With various flavors, coatings, and toppings, you can make each batch uniquely yours, perfect for any occasion.
Fun Activity: Making cake pops is a delightful project to enjoy, whether you’re cooking solo or involving family and friends.
Perfect for Sharing: Their bite-sized nature makes them a crowd-pleaser; just grab one and enjoy without the mess!
Quick to Make: With simple steps and minimal prep time, you can whip up these treats without stressing over complicated techniques.
Bring a touch of joy to your table with these delightful confections and check out our expert tips for perfecting your pop-making skills!
Chocolate Cake Pops Ingredients
For the Cake
- Devil’s Food Cake Mix – The foundation of your chocolate cake pops; feel free to try different cake flavors for a twist!
- Water – Hydrates the cake mix; no substitutions necessary.
- Vegetable Oil – Adds moisture to the cake; for a richer flavor, substitute with melted butter.
- Large Eggs – Binds everything together; you can use flax eggs for a vegan alternative.
For the Frosting
- Unsalted Butter – Creates a fluffy frosting; margarine can be swapped for a dairy-free option.
- Powdered Sugar – Sweetens and stabilizes the frosting; adjust the amount for less sweetness if desired.
- Unsweetened Cocoa Powder – Deepens the chocolate flavor; dark cocoa can be used for an even richer taste.
- Milk – Adjusts the frosting consistency; substitute with plant-based milk for a dairy-free recipe.
- Vanilla Extract – Enhances overall flavor; try almond or mint extract for a unique twist!
For Coating & Decoration
- Semi-Sweet Chocolate – A deliciously rich coating; consider using dark or white chocolate for variety.
- Assorted Sprinkles – Fun decorative elements for your cake pops; available in many colors and themes.
- Lollipop Sticks – Essential for assembling your cake pops; both wooden and plastic options work well.
- Styrofoam Block (optional) – Great for displaying cake pops vertically, adding to their presentation charm.
Dive into making these chocolate cake pops and enjoy creating a sweet treat perfect for any occasion!
How to Make Chocolate Cake Pops
-
Preheat Oven: Set your oven to 350°F (175°C). Prepare two 9-inch round baking pans by greasing them lightly so your cake comes out without a hitch!
-
Mix Batter: In a mixing bowl, combine the devil’s food cake mix, water, vegetable oil, and eggs. Beat the mixture for 2 minutes until it’s smooth and well-blended.
-
Bake: Pour the batter evenly into the prepared pans. Bake for 30-35 minutes, or until a skewer inserted in the center comes out clean—your kitchen will smell heavenly!
-
Cool Cakes: Once baked, allow the cakes to cool in the pans for about 10 minutes. Then, transfer them to a wire rack to cool completely.
-
Prepare Frosting: In another bowl, beat the softened unsalted butter until fluffy. Gradually add powdered sugar, then mix in cocoa powder and milk, beating until your frosting is smooth and creamy.
-
Crumble Cakes: After cooling, crumble the cakes into a large mixing bowl. Add about 2 cups of prepared frosting to the crumbled cake and mix until well combined and moldable.
-
Form Balls: Shape the mixture into 1-inch balls. Place them on a baking sheet lined with parchment paper and freeze for at least 30 minutes. This step helps them hold their shape!
-
Melt Chocolate: While the cake balls are chilling, melt semi-sweet chocolate in a microwave or double boiler. Stir it every 30 seconds until it’s smooth and glossy.
-
Insert Sticks: Take the chilled cake balls and halfway insert lollipop sticks into each one. This makes the dipping process easier and more secure!
-
Dip in Chocolate: Dip each cake pop into the melted chocolate, ensuring it’s completely coated. Tap off any excess chocolate gently before proceeding.
-
Add Sprinkles: While the chocolate is still wet, add any assorted sprinkles you desire to your cake pops for that perfect finishing touch.
-
Chill: Place the finished cake pops back in the refrigerator for about 30 minutes to allow the chocolate coating to set firmly.
-
Display: Arrange your beautifully decorated pops on a styrofoam block, vase, or decorative container. You can even add a ribbon for a touch of flair!
-
Store: Enjoy your chocolate cake pops fresh! If you need to store them, keep them in an airtight container in the fridge for up to 3 days.
Optional: Drizzle some melted white chocolate over the pops for an extra decorative touch!
Exact quantities are listed in the recipe card below.
How to Store and Freeze Chocolate Cake Pops
Fridge: Keep cake pops in an airtight container to maintain freshness for up to 3 days. Allow them to come to room temperature before serving for optimal flavor.
Freezer: If you want to extend their shelf life, wrap each cake pop in plastic wrap and place them in a freezer-safe container. They can be frozen for up to 2 months.
Thawing: To enjoy frozen chocolate cake pops, transfer them to the fridge to thaw overnight. Avoid defrosting at room temperature to keep the chocolate coating intact.
Reheating: There’s no need to reheat—enjoy them chilled or at room temperature for the best experience of these delightful treats!
What to Serve with Chocolate Cake Pops?
Elevate your dessert experience with these sweet treats that will leave everyone smiling and satisfied.
- Coffee: The aromatic warmth of a freshly brewed cup complements the rich chocolate, perfect for afternoon enjoyment.
- Vanilla Ice Cream: A scoop of creamy vanilla balances the sweetness of the cake pops, creating a match made in dessert heaven.
- Fresh Berries: Juicy strawberries or raspberries add a refreshing tartness, enhancing the overall flavor profile beautifully.
- Milkshakes: A thick chocolate or vanilla milkshake pairs wonderfully, making for a decadent yet fun pairing.
- Fruit Salad: A light, colorful fruit salad introduces a fresh element that perfectly counteracts the richness of the chocolate.
- Sparkling Water with Lemon: This fizzy and zesty drink refreshes the palate after indulging in the cake pops.
- Hot Chocolate: For the ultimate chocolate lover’s dream, serve with a cup of warm hot chocolate—because you can never have too much chocolate!
- Nutty Biscotti: Crunchy biscotti offers a delightful texture contrast, perfect for dipping or enjoying alongside your pops. Treat your loved ones by curating these delightful pairings to create memorable moments.
Chocolate Cake Pops Variations
Feel free to experiment and personalize your chocolate cake pops with these fun and delicious ideas!
-
Dairy-Free: Swap butter for coconut oil and use plant-based milk to create a rich dairy-free frosting.
Crafting a vegan version means everyone can join in on the delights of cake pops! -
Flavor Fusion: Incorporate spices like cinnamon or nutmeg into the cake batter for a warm, cozy twist.
These subtle flavors can elevate your chocolate experience to a whole new level! -
Nutty Crunch: Add chopped nuts like walnuts or pecans into the cake mix for some delightful texture and flavor.
A nutty surprise makes each bite even more interesting! -
Seasonal Spice: Use pumpkin spice in the frosting for an autumn-inspired treat that’s irresistible.
The aroma alone will transport you to a bustling pumpkin patch on a crisp fall day! -
Colorful Coating: For a festive touch, use colored candy melts instead of chocolate for a bright and cheerful presentation.
Every occasion gets a little more festive with these vibrant hues! -
Fruit Infusion: Add a tablespoon of raspberry or orange extract to the frosting for a fruity kick.
This small tweak transforms your chocolate cake pops into a fruity delight everyone’s sure to love! -
Chocolate Lovers: Mix in chocolate chips or chunks into the cake batter for decadent chocolate explosion.
More chocolate equals a richer, more indulgent experience—perfect for the true chocoholics in your life! -
Spiced Up Heat: Try adding a touch of cayenne pepper or chili powder to the chocolate coating for a surprising heat.
The subtle spice will add a delightful kick, intriguing your taste buds with unexpected flavors!
Make Ahead Options
These chocolate cake pops are perfect for meal prep enthusiasts looking to save time during busy weeks! You can bake the cake up to 24 hours in advance; simply let it cool completely, wrap it tightly in plastic wrap, and refrigerate. Additionally, you can prepare the frosting and store it in the fridge for up to 3 days before mixing it with the crumbled cake. When you’re ready to assemble, just crumble the cake, mix in the frosting, and form your balls. After chilling the balls for 30 minutes in the freezer, dip them in chocolate and enjoy restaurant-quality chocolate cake pops that are just as delicious as if they were made on the spot!
Expert Tips for Chocolate Cake Pops
Frosting Consistency: Ensure the frosting is smooth and creamy; this helps the mixture adhere well to cake balls. If too thick, add a splash of milk gradually.
Chill Thoroughly: Make sure to freeze the shaped cake balls for at least 30 minutes; this prevents them from falling off the sticks during dipping.
Double Dipping: For a thicker chocolate coating, consider double dipping the pops. Let the first layer set before dipping again for that extra indulgence!
Creative Toppings: Get inventive with toppings—feel free to use crushed cookies, nuts, or flavored sprinkles to elevate your chocolate cake pops to new heights!
Room Temperature Butter: Always use room temperature unsalted butter for frosting; this ensures a fluffy, well-mixed base.
Be sure to follow these tips for an irresistible batch of chocolate cake pops that will impress everyone!
Chocolate Cake Pops Recipe FAQs
What type of cake mix should I use for chocolate cake pops?
Absolutely, you can use devil’s food cake mix for a classic taste! However, feel free to experiment with other flavors like red velvet, vanilla, or even lemon for a unique twist.
How should I store leftover chocolate cake pops?
To keep your chocolate cake pops fresh, store them in an airtight container in the refrigerator for up to 3 days. Allow them to come to room temperature before enjoying for the best flavor and texture.
Advertisement
Can I freeze chocolate cake pops?
Yes! Wrap each cake pop individually in plastic wrap and place them in a freezer-safe container. They can be frozen for up to 2 months. When you’re ready to enjoy, simply transfer them to the fridge to thaw overnight—this helps maintain the chocolate coating.
What if my cake balls are falling off the sticks?
This can happen if your cake balls are not frozen long enough. Ensure they are thoroughly chilled for at least 30 minutes before dipping. You can also dip the sticks in melted chocolate before inserting them into the cake balls; this helps them adhere better.
Are these chocolate cake pops suitable for people with allergies?
If you have dietary restrictions, you can easily adjust the ingredients! Substitute the eggs with flax eggs for a vegan option, and use dairy-free butter and milk. Always check product labels for allergens, especially in the cake mix and chocolate used.
How do I get the perfect consistency for the frosting?
For a smooth frosting, start with softened unsalted butter at room temperature. Gradually add the powdered sugar, cocoa powder, and milk, mixing until you achieve a creamy consistency. If it’s too thick, add a splash of milk gradually until you reach the desired texture.
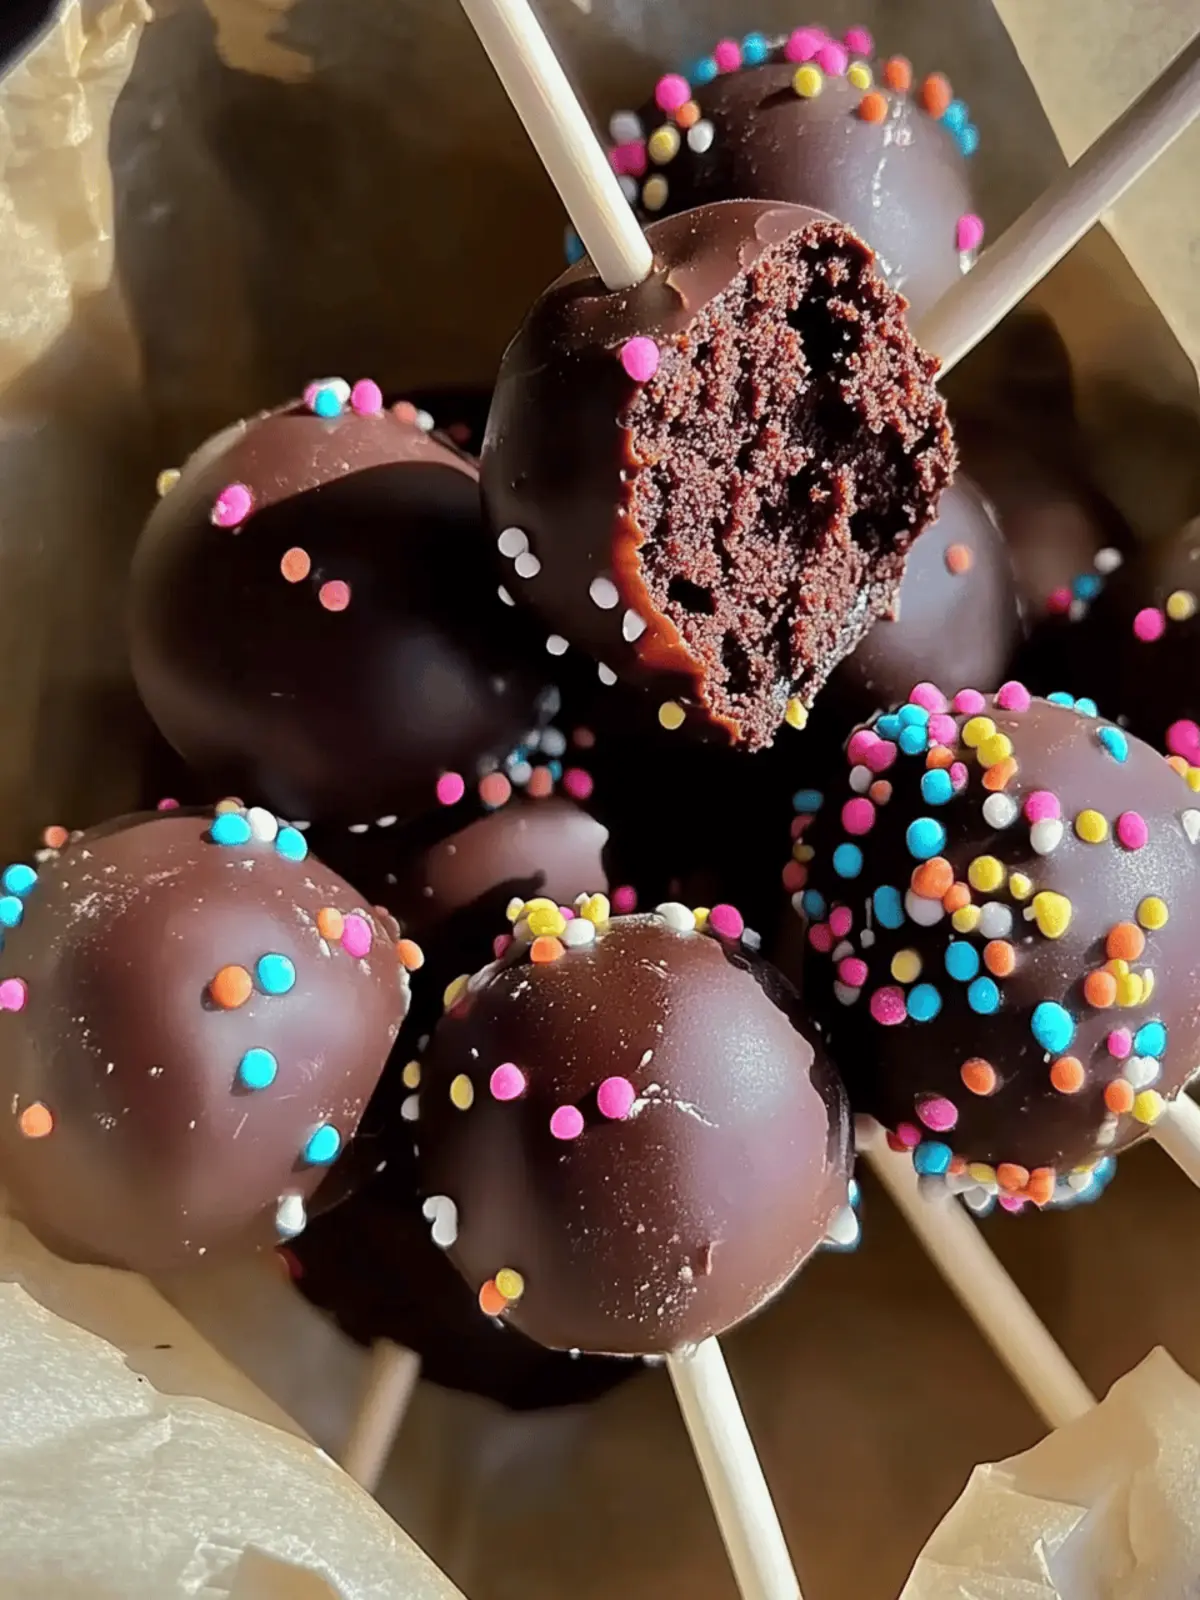
Chocolate Cake Pops: A Fun Twist on a Classic Treat
Ingredients
Equipment
Method
- Preheat Oven: Set your oven to 350°F (175°C) and grease two 9-inch round baking pans.
- Mix Batter: Combine the devil's food cake mix, water, vegetable oil, and eggs in a mixing bowl. Beat for 2 minutes until smooth.
- Bake: Pour batter evenly into prepared pans and bake for 30-35 minutes until a skewer comes out clean.
- Cool Cakes: Allow the cakes to cool in the pans for 10 minutes, then transfer to a wire rack to cool completely.
- Prepare Frosting: Beat softened butter until fluffy, gradually add powdered sugar, then mix in cocoa powder and milk until smooth.
- Crumble Cakes: Crumble the cooled cakes into a large bowl and mix in 2 cups of frosting until moldable.
- Form Balls: Shape into 1-inch balls and freeze for at least 30 minutes.
- Melt Chocolate: Melt semi-sweet chocolate until smooth.
- Insert Sticks: Halfway insert lollipop sticks into chilled cake balls.
- Dip in Chocolate: Dip each cake pop into melted chocolate and tap off excess.
- Add Sprinkles: Add sprinkles while the chocolate is still wet.
- Chill: Place finished pops back in the fridge for about 30 minutes.
- Display: Arrange cake pops on a styrofoam block or decorative container.
- Store: Keep in an airtight container in the fridge for up to 3 days.

