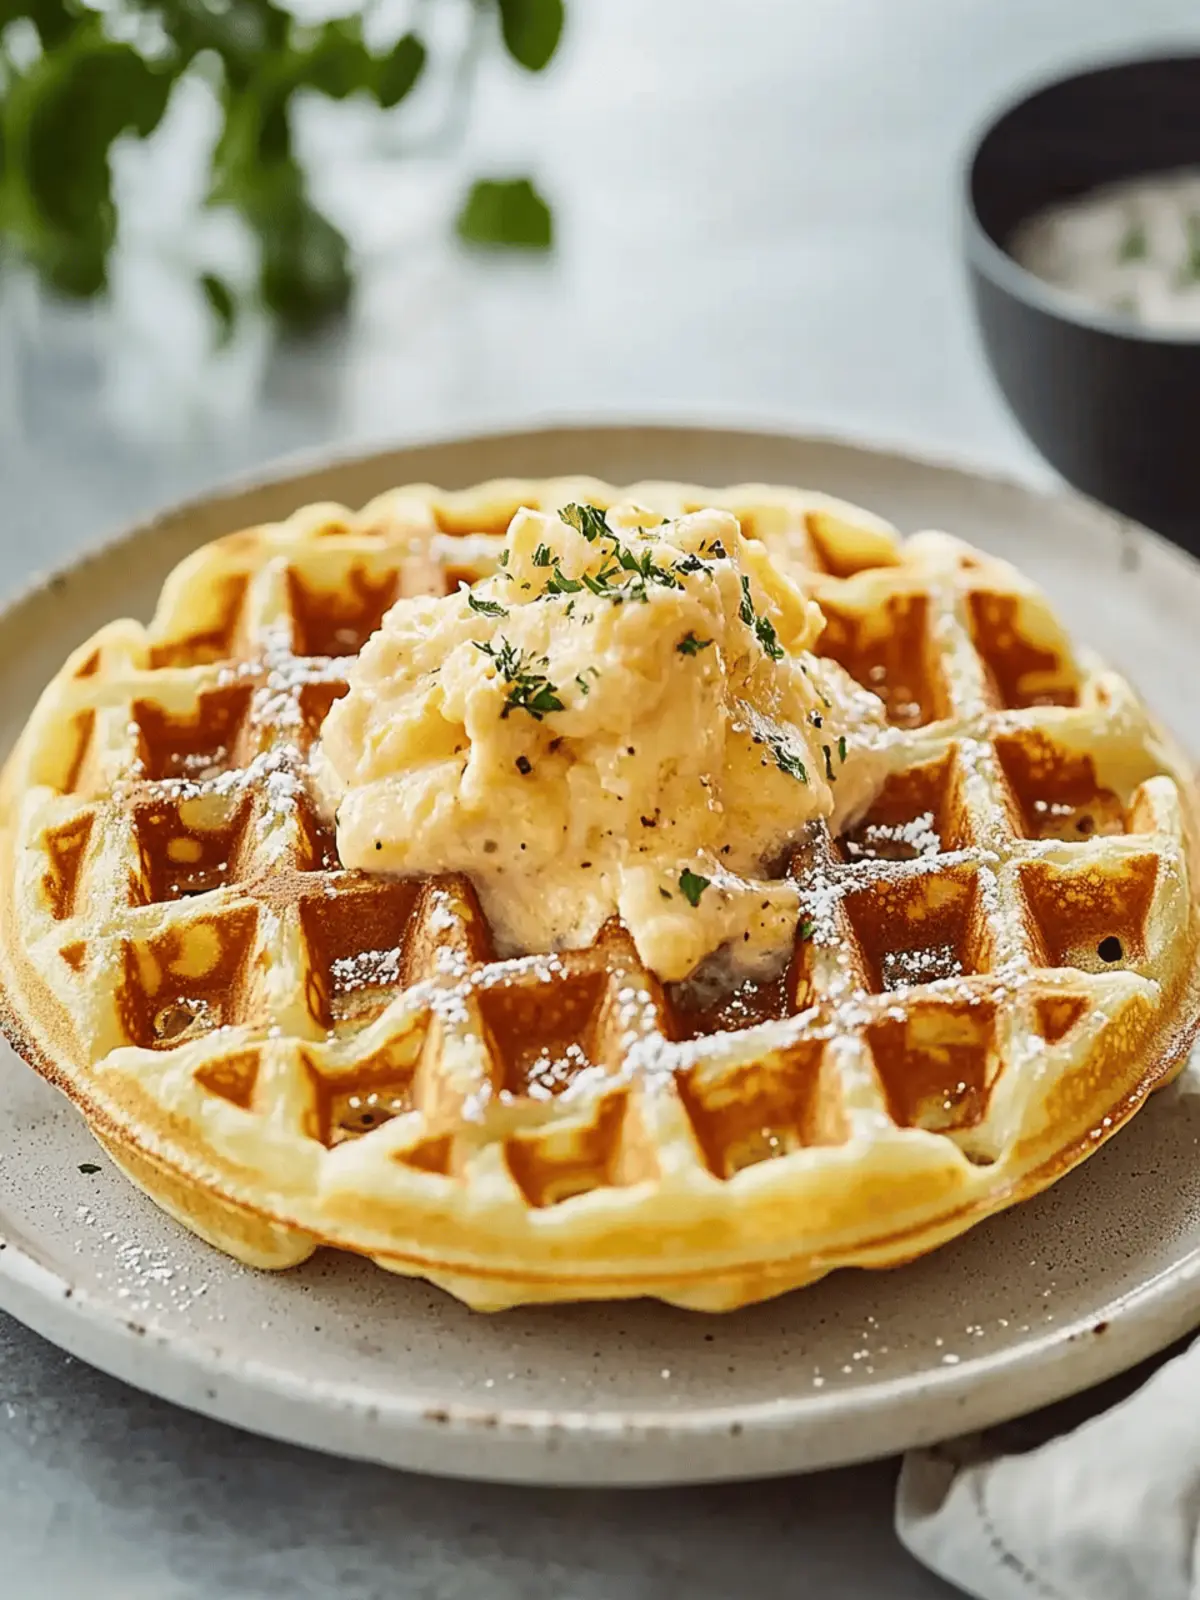
There’s something truly special about the enticing aroma of garlic mingling with melted cheese that makes my mouth water. Imagine biting into a perfectly crispy-chewy savory waffle, golden brown on the outside and fluffy on the inside, each bite oozing with rich flavors. That’s the joy you’ll experience with my Cheesy Garlic Waffles! This delightful dish effortlessly elevates any breakfast or brunch, making it perfect for sharing with family or enjoying with a cup of coffee after a long week.
What I love most about this recipe is its versatility—I can easily switch up the cheeses or toss in fresh herbs to match my mood! Whether you’re a cheese aficionado or simply seeking an easy recipe to break away from that fast-food routine, these waffles will have you excited to cook at home. So, roll up your sleeves and let’s dive into the irresistible world of cheesy garlic goodness that’s bound to become a staple in your kitchen!
Why are Cheesy Garlic Waffles a must-try?
Savoriness at its finest: With rich garlic and melted cheese, each bite bursts with flavor that will leave you wanting more.
Quick and easy to make: In just a few simple steps, anyone can whip these up and impress guests!
Endless variations: Customize with your favorite cheeses or add in fresh herbs for a personal touch.
Perfect for any occasion: Breakfast, brunch, or even as a delightful snack, these waffles are your new go-to recipe.
Crowd-pleaser: Whether it’s family or friends, everyone will rave about this unique twist on breakfast classics!
With such versatility, you might also explore other delicious options like savory pancake recipes to keep your meals exciting!
Cheesy Garlic Waffles Ingredients
For the Batter
• All-purpose flour – Provides structure and fluffiness; for a healthier twist, try whole wheat flour instead.
• Baking powder – Ensures your waffles are light and airy every time.
• Salt – Enhances the overall flavor of the waffles.
• Garlic powder – Adds essential garlic flavor without moisture; fresh minced garlic can be used for an extra kick.
• Shredded cheese – The heart of this recipe; cheddar is perfect, but feel free to use mozzarella or pepper jack for a different taste.
• Eggs – Provide moisture and richness to make the waffles satisfying.
• Milk – Essential for batter consistency; use whole, skim, or plant-based milk as desired.
• Melted butter – Contributes to a crispy exterior and adds rich flavor.
Optional Add-ins
• Fresh herbs (like parsley or chives) – Add color and refreshing flavors; customize your Cheesy Garlic Waffles to your liking.
• Toppings (sour cream or salsa) – Perfect for serving and enhancing your waffle experience!
How to Make Cheesy Garlic Waffles
-
Preheat your waffle iron according to the manufacturer’s instructions. This is essential for achieving a crispy, golden exterior.
-
Whisk together in a large bowl the all-purpose flour, baking powder, salt, and garlic powder. This mixture forms the base of your delicious waffles.
-
Stir in the shredded cheese until it’s evenly distributed throughout the dry ingredients. The cheese is what makes these waffles a cheesy delight!
-
Beat the eggs in a separate bowl, then mix in the milk and melted butter until well combined. This wet mixture adds moisture and richness to your batter.
-
Combine the wet ingredients with the dry mixture. Gently fold until just combined to avoid tough waffles—some lumps are perfectly fine!
-
Grease the waffle iron lightly. Pour the appropriate amount of batter into the preheated iron, ensuring you don’t overfill it.
-
Cook for 5-7 minutes, or until the waffles are golden brown and crisp. Keep an eye on them so they’re just right!
-
Serve warm with desired toppings, such as sour cream or salsa, to enhance your Cheesy Garlic Waffles experience.
Optional: Sprinkle with fresh herbs for added color and flavor.
Exact quantities are listed in the recipe card below.
Storage Tips for Cheesy Garlic Waffles
Room Temperature: Let your cheesy garlic waffles cool completely before stacking. They can sit out for about 2 hours, but make sure to cover them to avoid drying out.
Fridge: Store any leftover cheesy garlic waffles in an airtight container for up to 3 days. To maintain their crispness, place a paper towel between layers to absorb moisture.
Freezer: Freeze your waffles individually by wrapping them in plastic wrap, then placing them in a freezer-safe bag. They’ll retain their deliciousness for up to 2 months.
Reheating: To reheat, pop them in a toaster or oven until warmed through and crispy, which brings back that lovely texture to your cheesy garlic waffles.
Cheesy Garlic Waffles Variations
Embrace the world of endless possibilities and tailor these waffles to match your cravings!
-
Cheese Swap: Try gouda for a smoky flavor or feta for a tangy twist. Each cheese brings its own unique character!
-
Herb Infusion: Mix in fresh herbs like thyme or rosemary for a fragrant boost. The aroma will awaken your senses as they cook!
-
Veggie Boost: Incorporate diced bell peppers or spinach for added nutrition and color. This creates an eye-pleasing medley in every bite.
-
Protein Power: Add cooked bacon or ham pieces to make your waffles heartier and more satisfying. Perfect for a fulfilling brunch!
-
Spicy Kick: Toss in some crushed red pepper flakes for a delightful heat that complements the savory flavors beautifully.
-
Savory Sweet: Drizzle maple syrup or honey on top for a sweet-savory fusion that makes each bite an unforgettable experience!
-
Different Flours: Experiment with whole wheat or gluten-free flour for a twist that suits different dietary needs while keeping the essence intact.
-
Fried Egg Topping: Top with a fried egg for a brunch treat that’s not only delicious but also Instagram-worthy—with yolk cascading over your waffles!
Expert Tips for Cheesy Garlic Waffles
-
Avoid Overmixing: Gently fold the batter until just combined to prevent tough waffles. A few lumps are perfectly fine for a tender texture.
-
Preheat the Waffle Iron: Ensure your waffle iron is fully preheated before cooking. This helps achieve a crispy exterior and prevents sticking.
-
Choose Melting Cheeses: Stick to cheeses that melt well, like cheddar or mozzarella, for a creamy consistency in your cheesy garlic waffles.
-
Accurate Measurements: Use measuring tools for precision. This ensures balanced flavors and the right texture in your waffles.
-
Customize Wisely: Experiment with adding spices and herbs, but be careful not to overpower the garlic and cheese flavors that make these waffles special.
Make Ahead Options
These Cheesy Garlic Waffles are perfect for meal prep enthusiasts! You can prepare the batter up to 24 hours in advance by mixing the dry ingredients (flour, baking powder, salt, garlic powder, and shredded cheese) and storing it in an airtight container in the refrigerator. For added freshness, beat the eggs and combine them with milk and melted butter right before cooking. When you’re ready to serve, simply combine the wet and dry ingredients, cook the waffles according to the recipe, and enjoy delicious, warm waffles with minimal effort! This method ensures that your waffles are just as tasty and fluffy when served as if they were made fresh that day.
What to Serve with Cheesy Garlic Waffles?
These delightful waffles can be the star of your meal, elevating any breakfast or brunch experience.
-
Scrambled Eggs: Fluffy, buttery eggs are a classic pairing that complements the cheesy crunch of your waffles, creating a perfect harmony of flavors.
-
Sautéed Spinach: This fresh, vibrant side adds color and nutrients, and its earthy taste balances the richness of the waffles beautifully.
-
Avocado Slices: Creamy avocado provides a luxurious contrast, enhancing the savory notes while bringing a delightful creaminess to each bite.
-
Tomato Salsa: A zesty, fresh salsa brings brightness and acidity, cutting through the richness of the cheese while adding a delightful pop of flavor.
-
Bacon or Sausage: Crispy, savory meat adds heartiness to your dish, providing a satisfying crunch that complements the soft waffles perfectly.
-
Buttermilk Pancakes: For a playful brunch spread, serve alongside fluffy pancakes drizzled with maple syrup for a sweet contrast to the savory waffles.
-
Herbed Yogurt Dip: A cool, tangy dip infused with herbs offers a refreshing counterpoint, perfect for balancing the richness of your cheesy garlic waffles.
-
Sparkling Water: Keep the meal light and refreshing with a splash of sparkling water. A hint of lemon can elevate your drink, enhancing the dining experience.
These pairings will transform your meal into an unforgettable feast, bringing cozy and delightful flavors to your table!
Cheesy Garlic Waffles Recipe FAQs
How do I choose the best cheese for my Cheesy Garlic Waffles?
Absolutely! For the best melt and flavor, I recommend using cheddar, as its sharpness complements the garlic beautifully. However, you can also experiment with mozzarella for a milder taste or pepper jack for a bit of heat. Just make sure the cheese you select melts well, resulting in those delightful, gooey pockets in your waffles.
What is the best way to store leftover Cheesy Garlic Waffles?
To keep your leftovers fresh, store them in an airtight container in the fridge for up to 3 days. I usually place a paper towel between the layers to absorb any moisture and help maintain their crispness. Just remember to let them cool completely before sealing them up!
Can I freeze my Cheesy Garlic Waffles, and how do I reheat them?
Absolutely! You can freeze these waffles for up to 2 months. Wrap each waffle in plastic wrap, then place them in a freezer-safe bag. When you’re ready to enjoy, simply pop them in a toaster or an oven preheated to 350°F (175°C) for about 10-15 minutes until they are warmed through and crispy again. Trust me, it’s worth the wait!
Advertisement
What should I do if my waffles turn out too tough?
If your waffles are tough, it’s likely due to overmixing the batter. You want to combine the ingredients just until everything is mixed. A few lumps are okay! Another tip is to ensure your waffle iron is preheated properly, as this helps achieve the desired texture.
Are there any dietary considerations for Cheesy Garlic Waffles?
Very! If you’re catering to specific dietary needs, you can easily make the recipe gluten-free by using a gluten-free flour blend instead of all-purpose flour. Additionally, for those who are lactose intolerant, try using lactose-free cheese or a dairy-free cheese alternative. As for pets, avoid sharing these waffles with dogs due to the garlic content, which isn’t safe for them.
How can I customize my Cheesy Garlic Waffles?
The more the merrier! You can spice things up by swapping in different cheeses like gouda for smokiness or feta for a tangy bite. Don’t hesitate to add diced veggies such as bell peppers or even cooked bacon for extra flavor. If you’re feeling adventurous, a drizzle of honey or maple syrup can create a delightful sweet-savory contrast when serving!

Cheesy Garlic Waffles: A Savory Twist for Your Breakfast Table
Ingredients
Equipment
Method
- Preheat your waffle iron according to the manufacturer’s instructions.
- Whisk together the all-purpose flour, baking powder, salt, and garlic powder in a large bowl.
- Stir in the shredded cheese until evenly distributed.
- Beat the eggs in a separate bowl, then mix in the milk and melted butter until well combined.
- Combine the wet ingredients with the dry mixture and gently fold until just combined.
- Grease the waffle iron lightly and pour in the appropriate amount of batter.
- Cook for 5-7 minutes, until golden brown and crisp.
- Serve warm with desired toppings.
